

The 12V battery is actually in the back of the Sienna Hybrid but you can still jump start your Sienna by connecting the jumper cables/pack to +/- terminals under the hood.
These instructions probably also apply to Rav-4 Hybrid, Highlander Hybrid, and etc.
Many Sienna Hybrid owners find out the hard way they can’t jump start their Sienna Hybrid like cars they’ve jump started in the past.
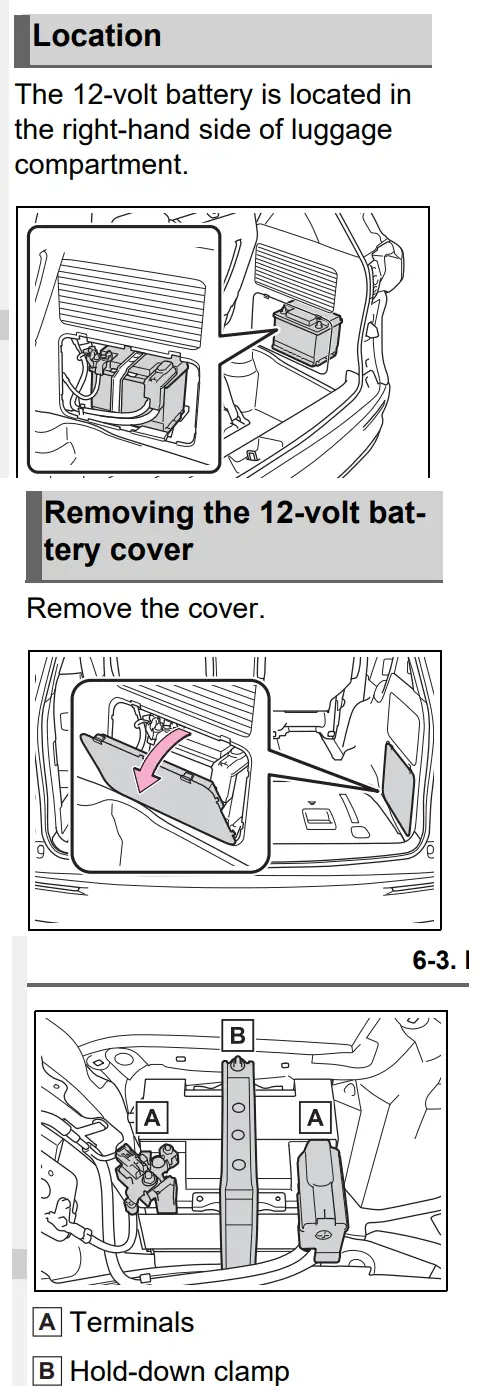
Unlike three generations of Sienna before this one, the 12 volt battery’s always been under the hood. For 2021+ all Sienna are hybrids and that means, like the Prius, the battery is in the back.
But, that doesn’t mean you can’t jump start your Sienna from the front. Au contraire, not only can you, Toyota recommends you do it from the front.
Here are the instructions below with my quick, step by step summary with locations of the positive and negative terminals below.
Jumper pack -If you’re using a jumper pack, connect the positive and negative cables of the jumper pack to the positive and negative terminals of your Sienna Hybrid locations shown below. If your cables cannot reach the positive or negative terminals, you can attempt to jump start your Sienna by connecting your jumper pack to the actual 12V battery in the trunk. If you’re using cables with another car, go to Step 1.
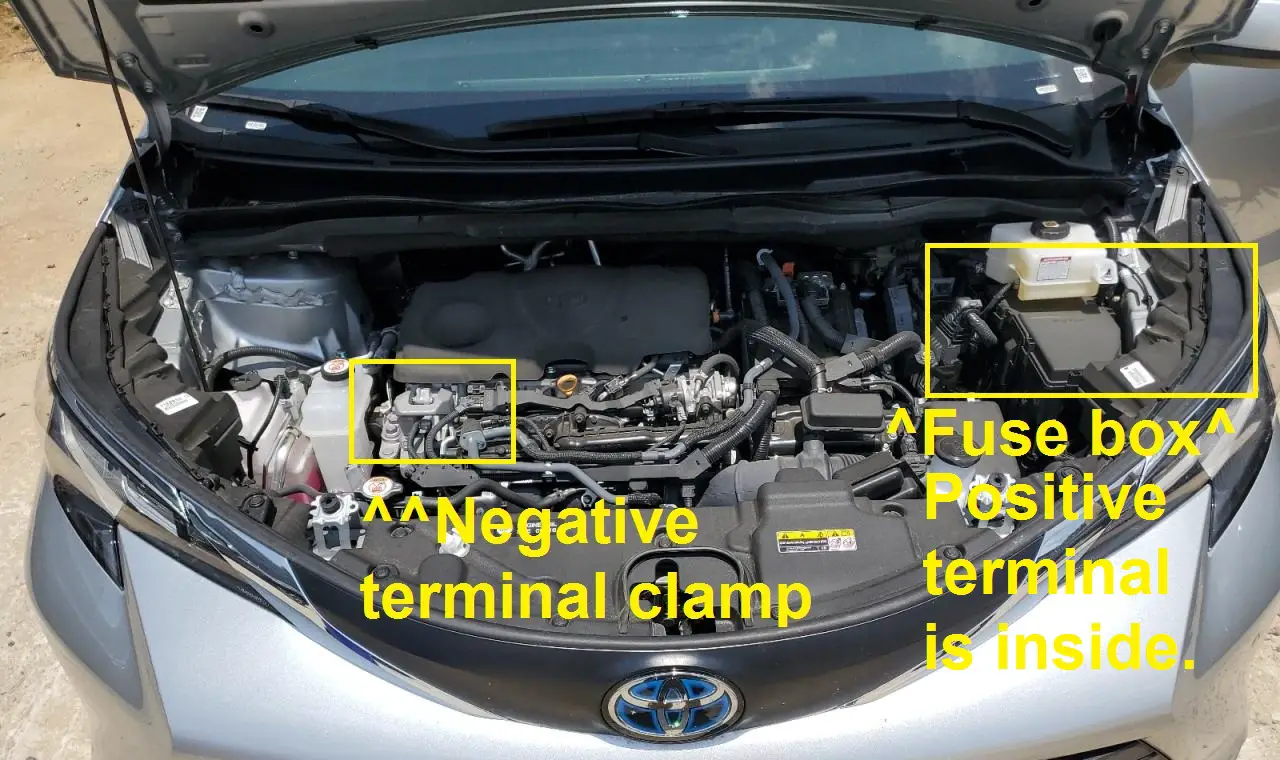
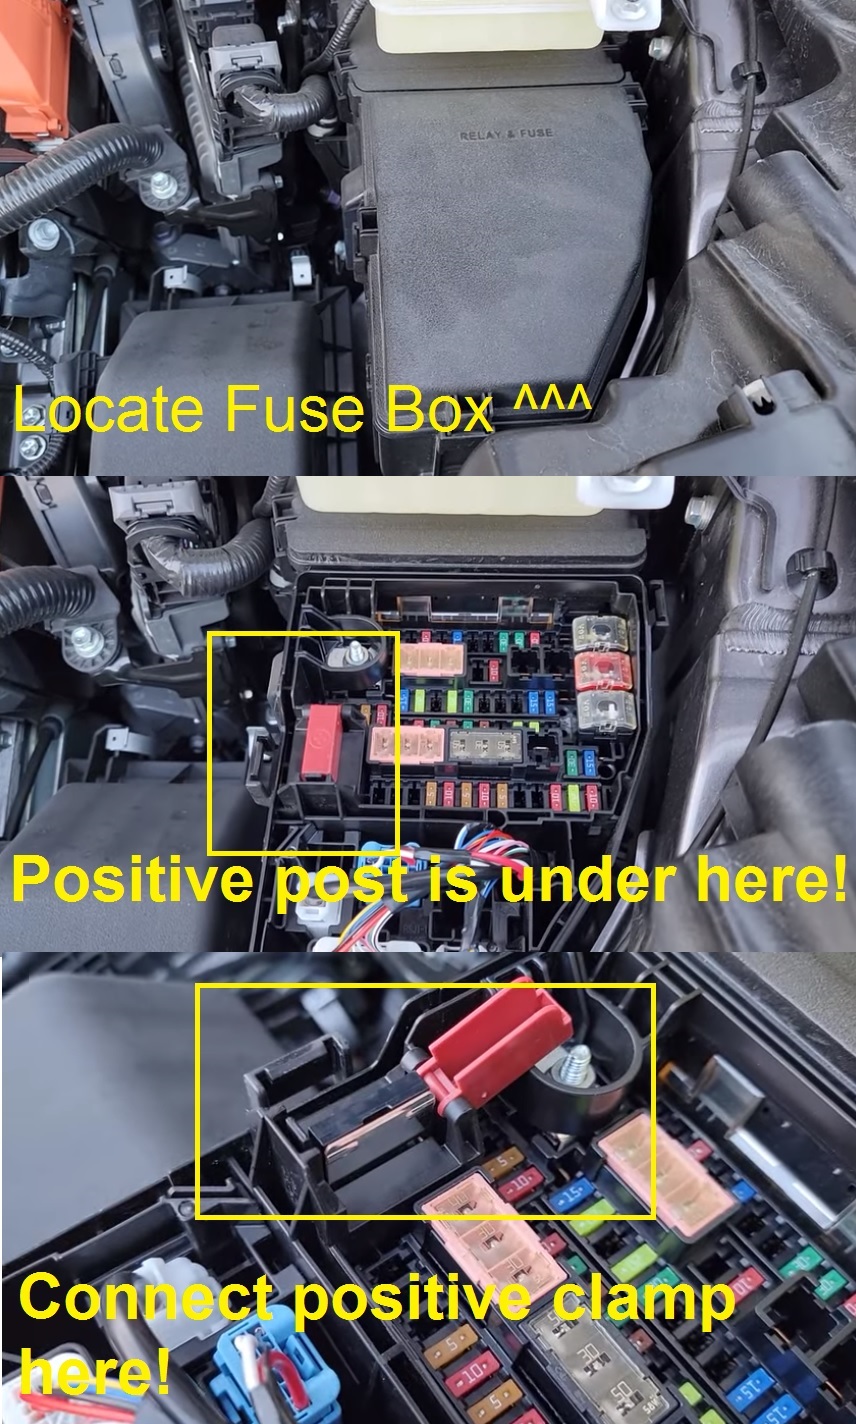
Step 0 – Here’s where you ‘ll find the fuse box where the red, positive terminal is. The Fuse box is on the right side of the engine. It says Relay and Fuse. And, the negative terminal clamp is the unpainted U-shaped clamp in the front of the engine to the left.
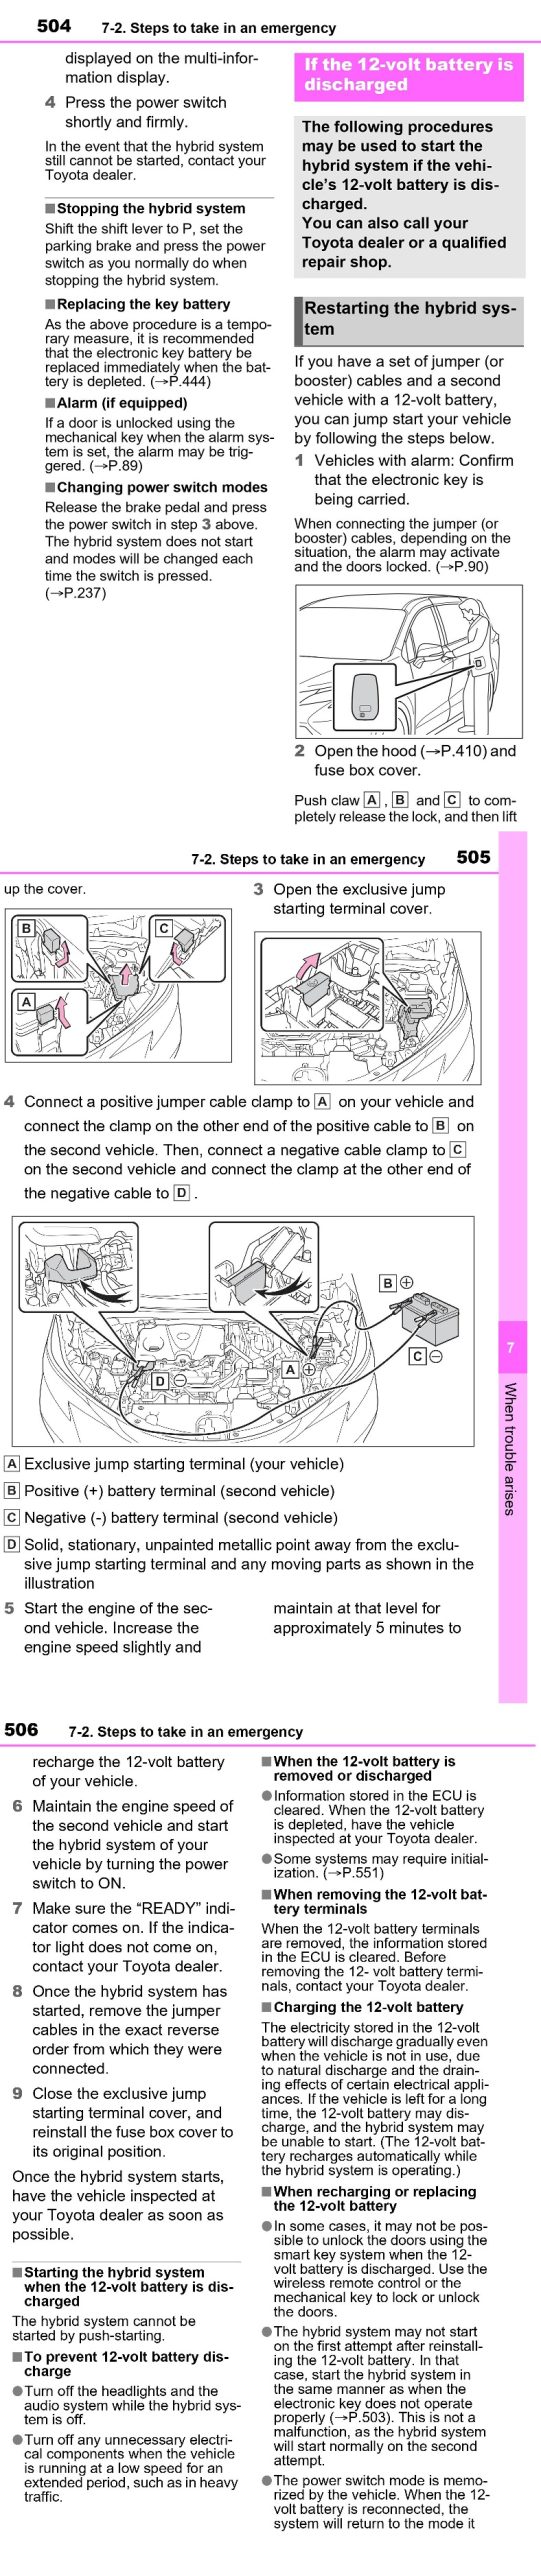
Step 1 – Connect a + positive jumper cable clamp to the positive terminal under the red tab of your Sienna, and then connect the other end of the positive cable to the positive terminal of the battery on the second vehicle (the one with the good battery.)
The positive is in the fuse box under a red, protective flip cover. You’ll need to open the Relay & Fuse Box to access the red, positive terminal.
Step 2 – Connect the -negative jumper cable to the negative terminal of the second vehicle, and then connect the other end of the negative cable to the unpainted clamp in front of the engine that serves as a negative terminal on your Sienna Hybrid.
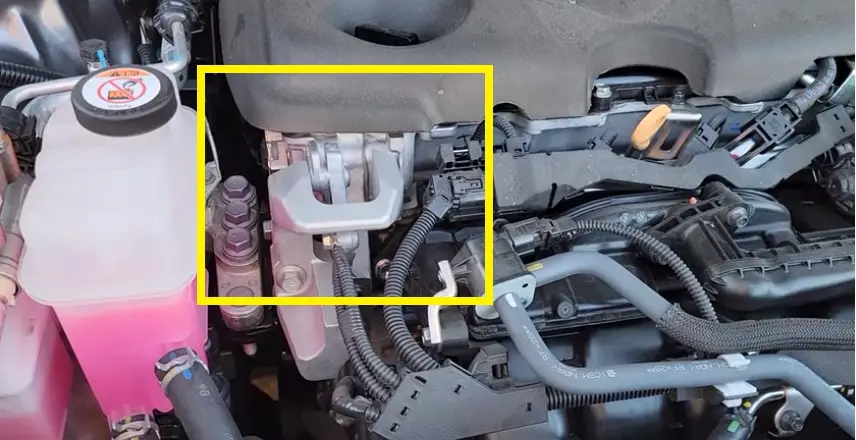
The negative is an unpainted U-shaped looking piece of metal in front of the engine located here.
Step 3 – Rev the second car slightly and allow it to run for five minutes so your dead Sienna Hybrid 12 V battery can charge.
Step 4 – Maintain the engine speed of the second vehicle and start the hybrid system of your vehicle by turning the power switch to ON. If the READY indicator does NOT come on, contact your local Toyota dealer.
Step 5 – Remove the cable in the reverse order you put them on.
Here’s what I summarized above, straight from the Sienna Hybrid Manual.
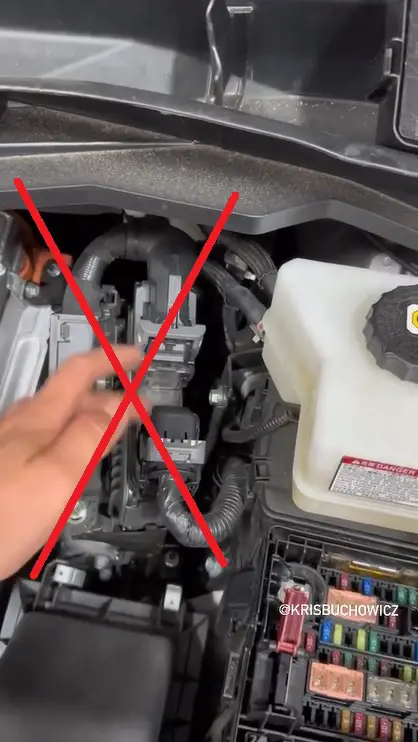
How to not fry your ECU attempting to jump start your Sienna by doing this.
According to Toyota Tech Chris Buchowicz in an Instagram video he posted, a common and expensive mistake he sees Sienna Hybrid owners do is connect the negative cable to metal parts near their Sienna Hybrid’s ECU. Doing that will fry your ECU. New ECUs cost $1,000+ so, it’s a mistake you don’t want to make.
Here’s his video below.
And, here’s where you do NOT want to place your jumper cables on.
I hope that’s helped. If you have anything to add, let me know in the comments below.
